"Agencies use storyboards to convey to clients potential solutions to a given problem....problems discovered during needfinding. Doing it this way allows you to tell a story and explain how a user will interact with your design, without the need to draw a single pixel or code a single line. Storyboards are generally used during the discovery phase of a project, or during pitching activities when we are trying to dazzle a client with our creative thinking!"
-- Mike Davison, UX Project Manager
This is the first team assignment. Review and share the user needs you brainstormed for A1: Needfinding. This week, your team will develop blueprints for your mobile web app, fleshing out your design ideas by creating a point of view, seeking inspiration, storyboarding, and making paper prototypes.
By now you should be a pro at writing a point of view from A1! Also, refer to this Google Doc for a point-of-view (from TA Rob) about writing a Point of View.
As a team, think about the user need you want to address and come up with a point of view that illustrates this need. Remember to look at the issue from a high-level; don't try to plan out all the functionality for your app or design a solution here. Refer to previous assignments on "point of view" for more guidance if needed.
Next, use your point of view and inspiration to come up with three different design ideas that address/engage your point of view to address a user need. Illustrate each of these ideas with a storyboard.
A storyboard is a comic-strip-like set of drawings about what your interface does and how it is used to accomplish tasks in a real usage scenario. Feeling stumped about how to show your ideas visually? Check out "Understanding Comics" by Scott McCloud, and Amal Dar Aziz's excellent Guide to Storyboarding. A good storyboard should clearly demonstrate who the user is, the usage situation, and the user's motivations for using the interface. It should show what the user can accomplish with your interface, but it needn't (and often shouldn't) show a specific user interface design. For a storyboard including an app screen, the details of the screen are not relevant, but what those screens enable you to accomplish is. In sum, every storyboard should start with a user need and end showing how that need is satisfied (i.e., a "satisfaction that addresses the need").
Each storyboard should comprise 5-8 panels and fit on one 8.5" x 11" sheet of paper. (It's OK to use more than one sheet per storyboard if you really need the space, but try to stay within one sheet.) Use a thick pen like a Sharpie---ballpoint pen or pencil is not acceptable. A thick pen is a good reminder to focus on the high-level and not sweat the details at this point. (Don't worry, in a few weeks you'll have plenty of time to sweat the details.)
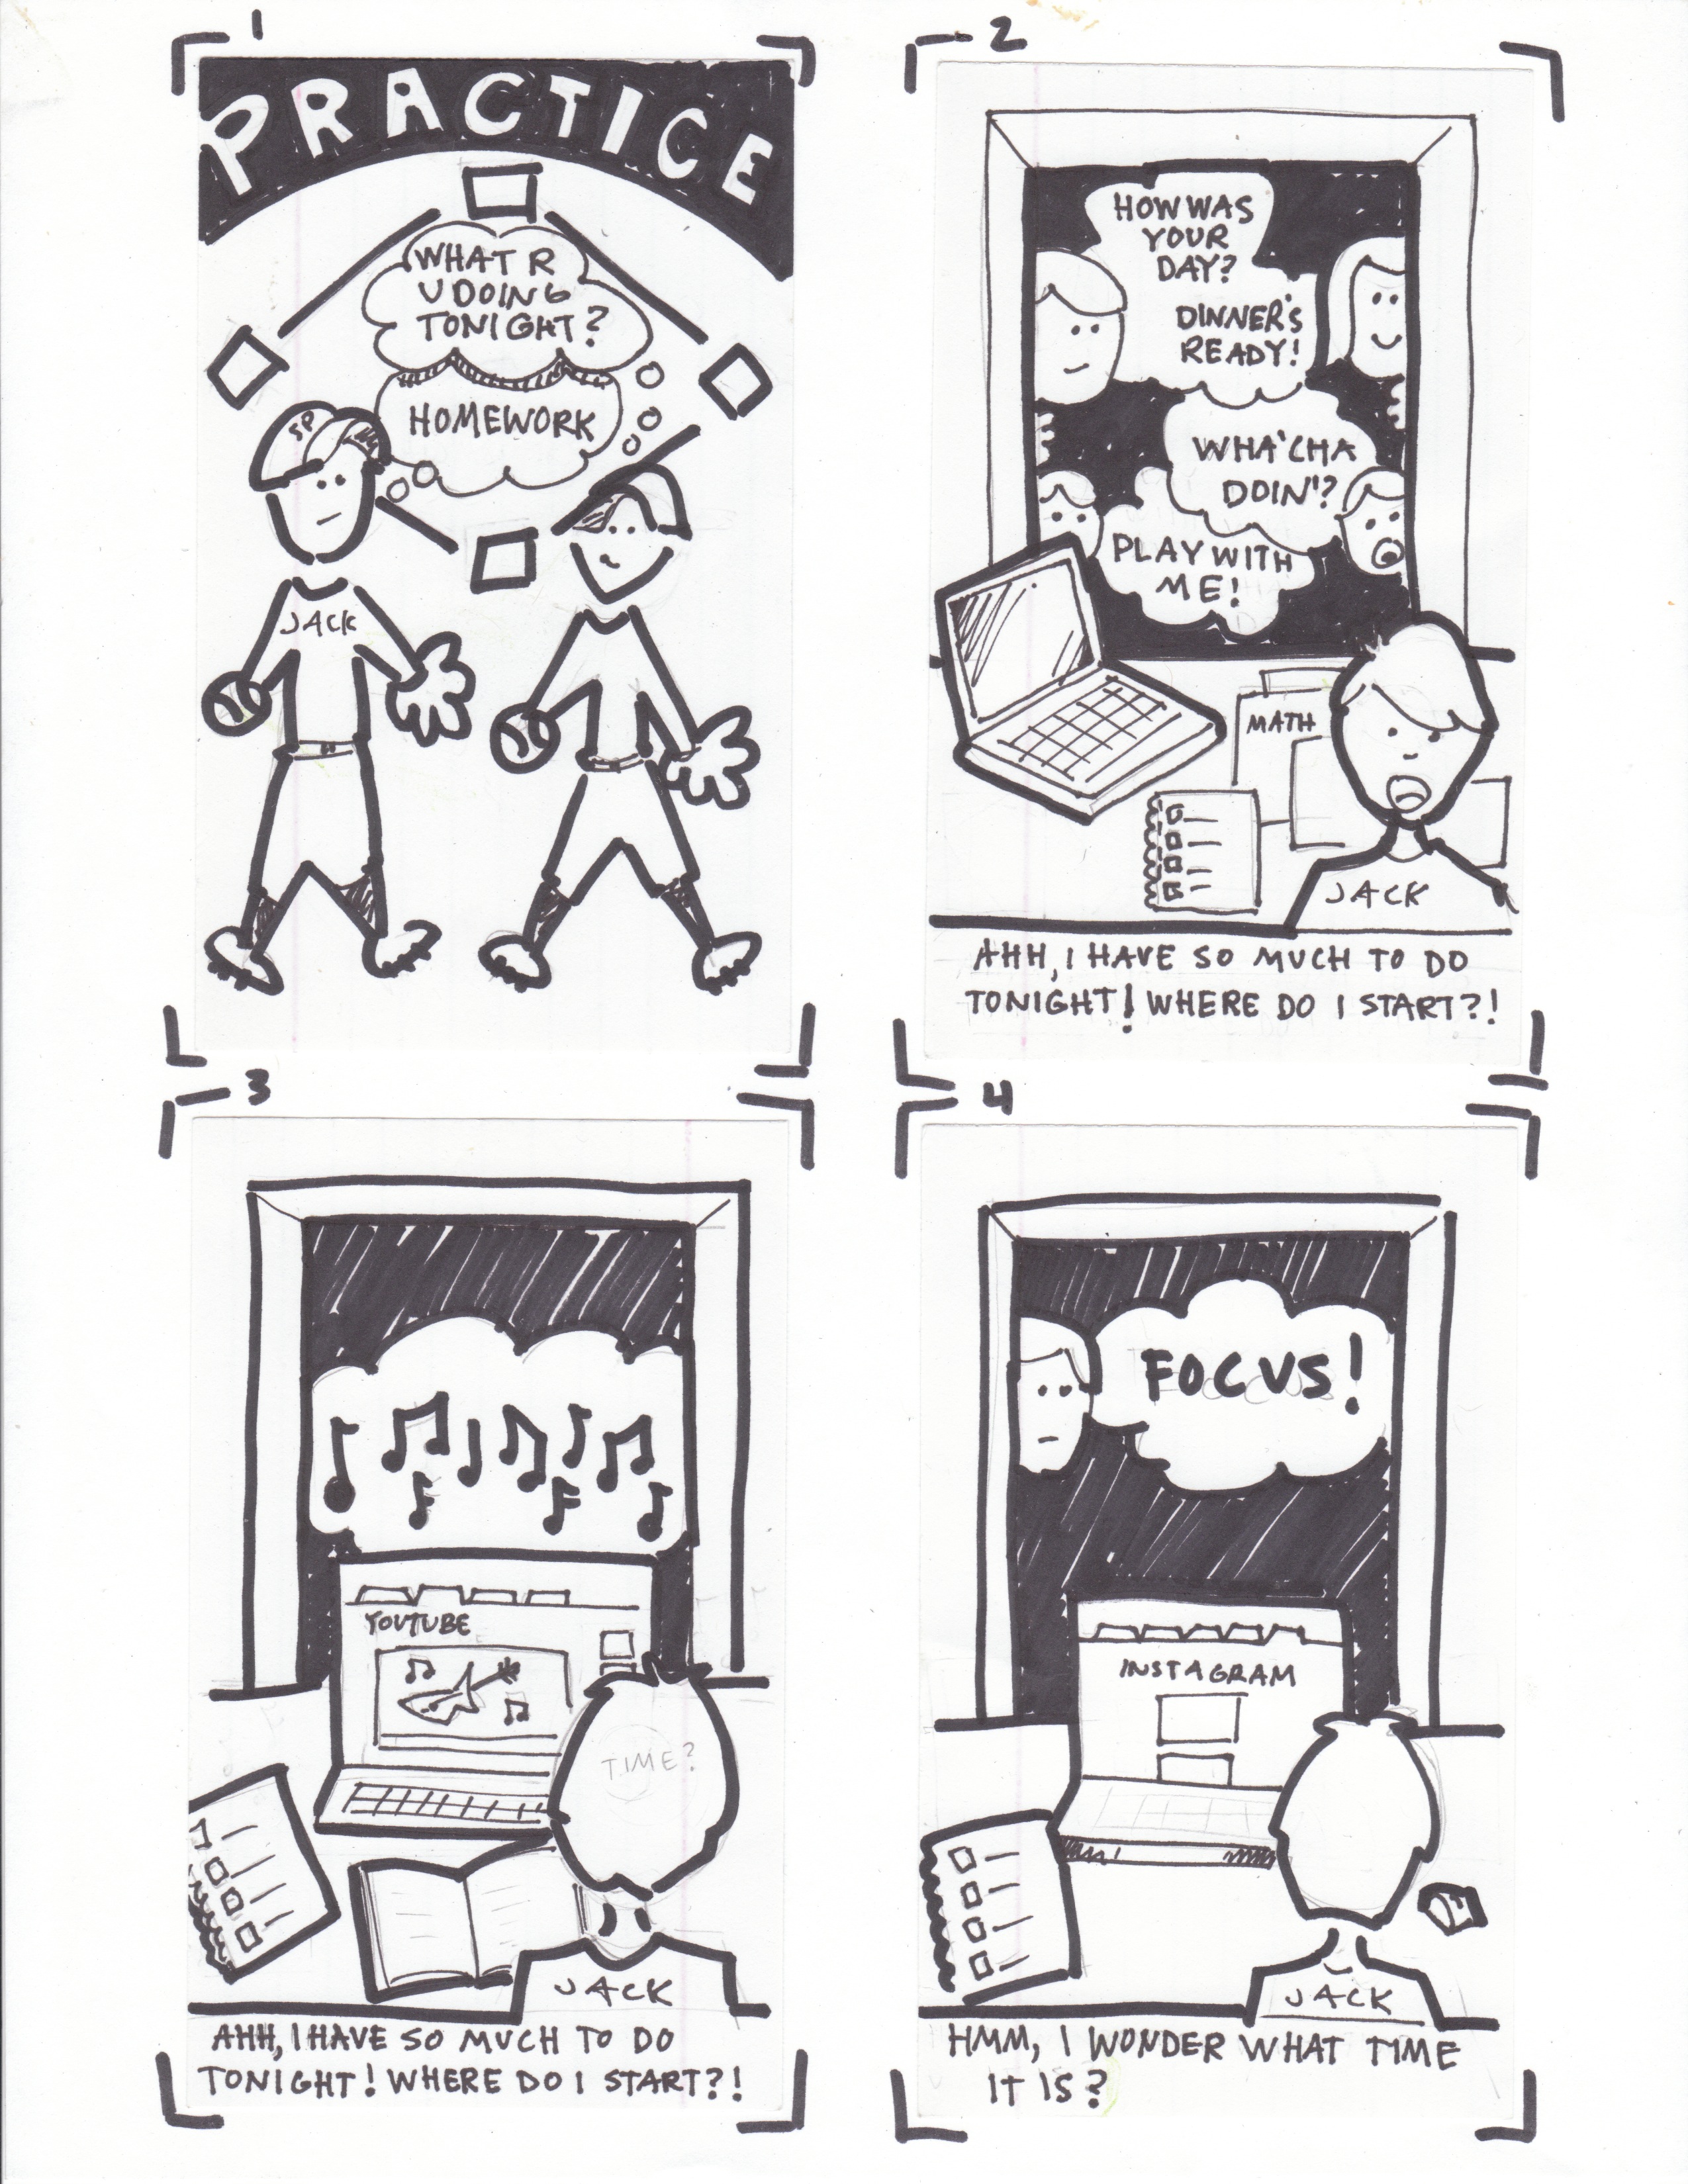
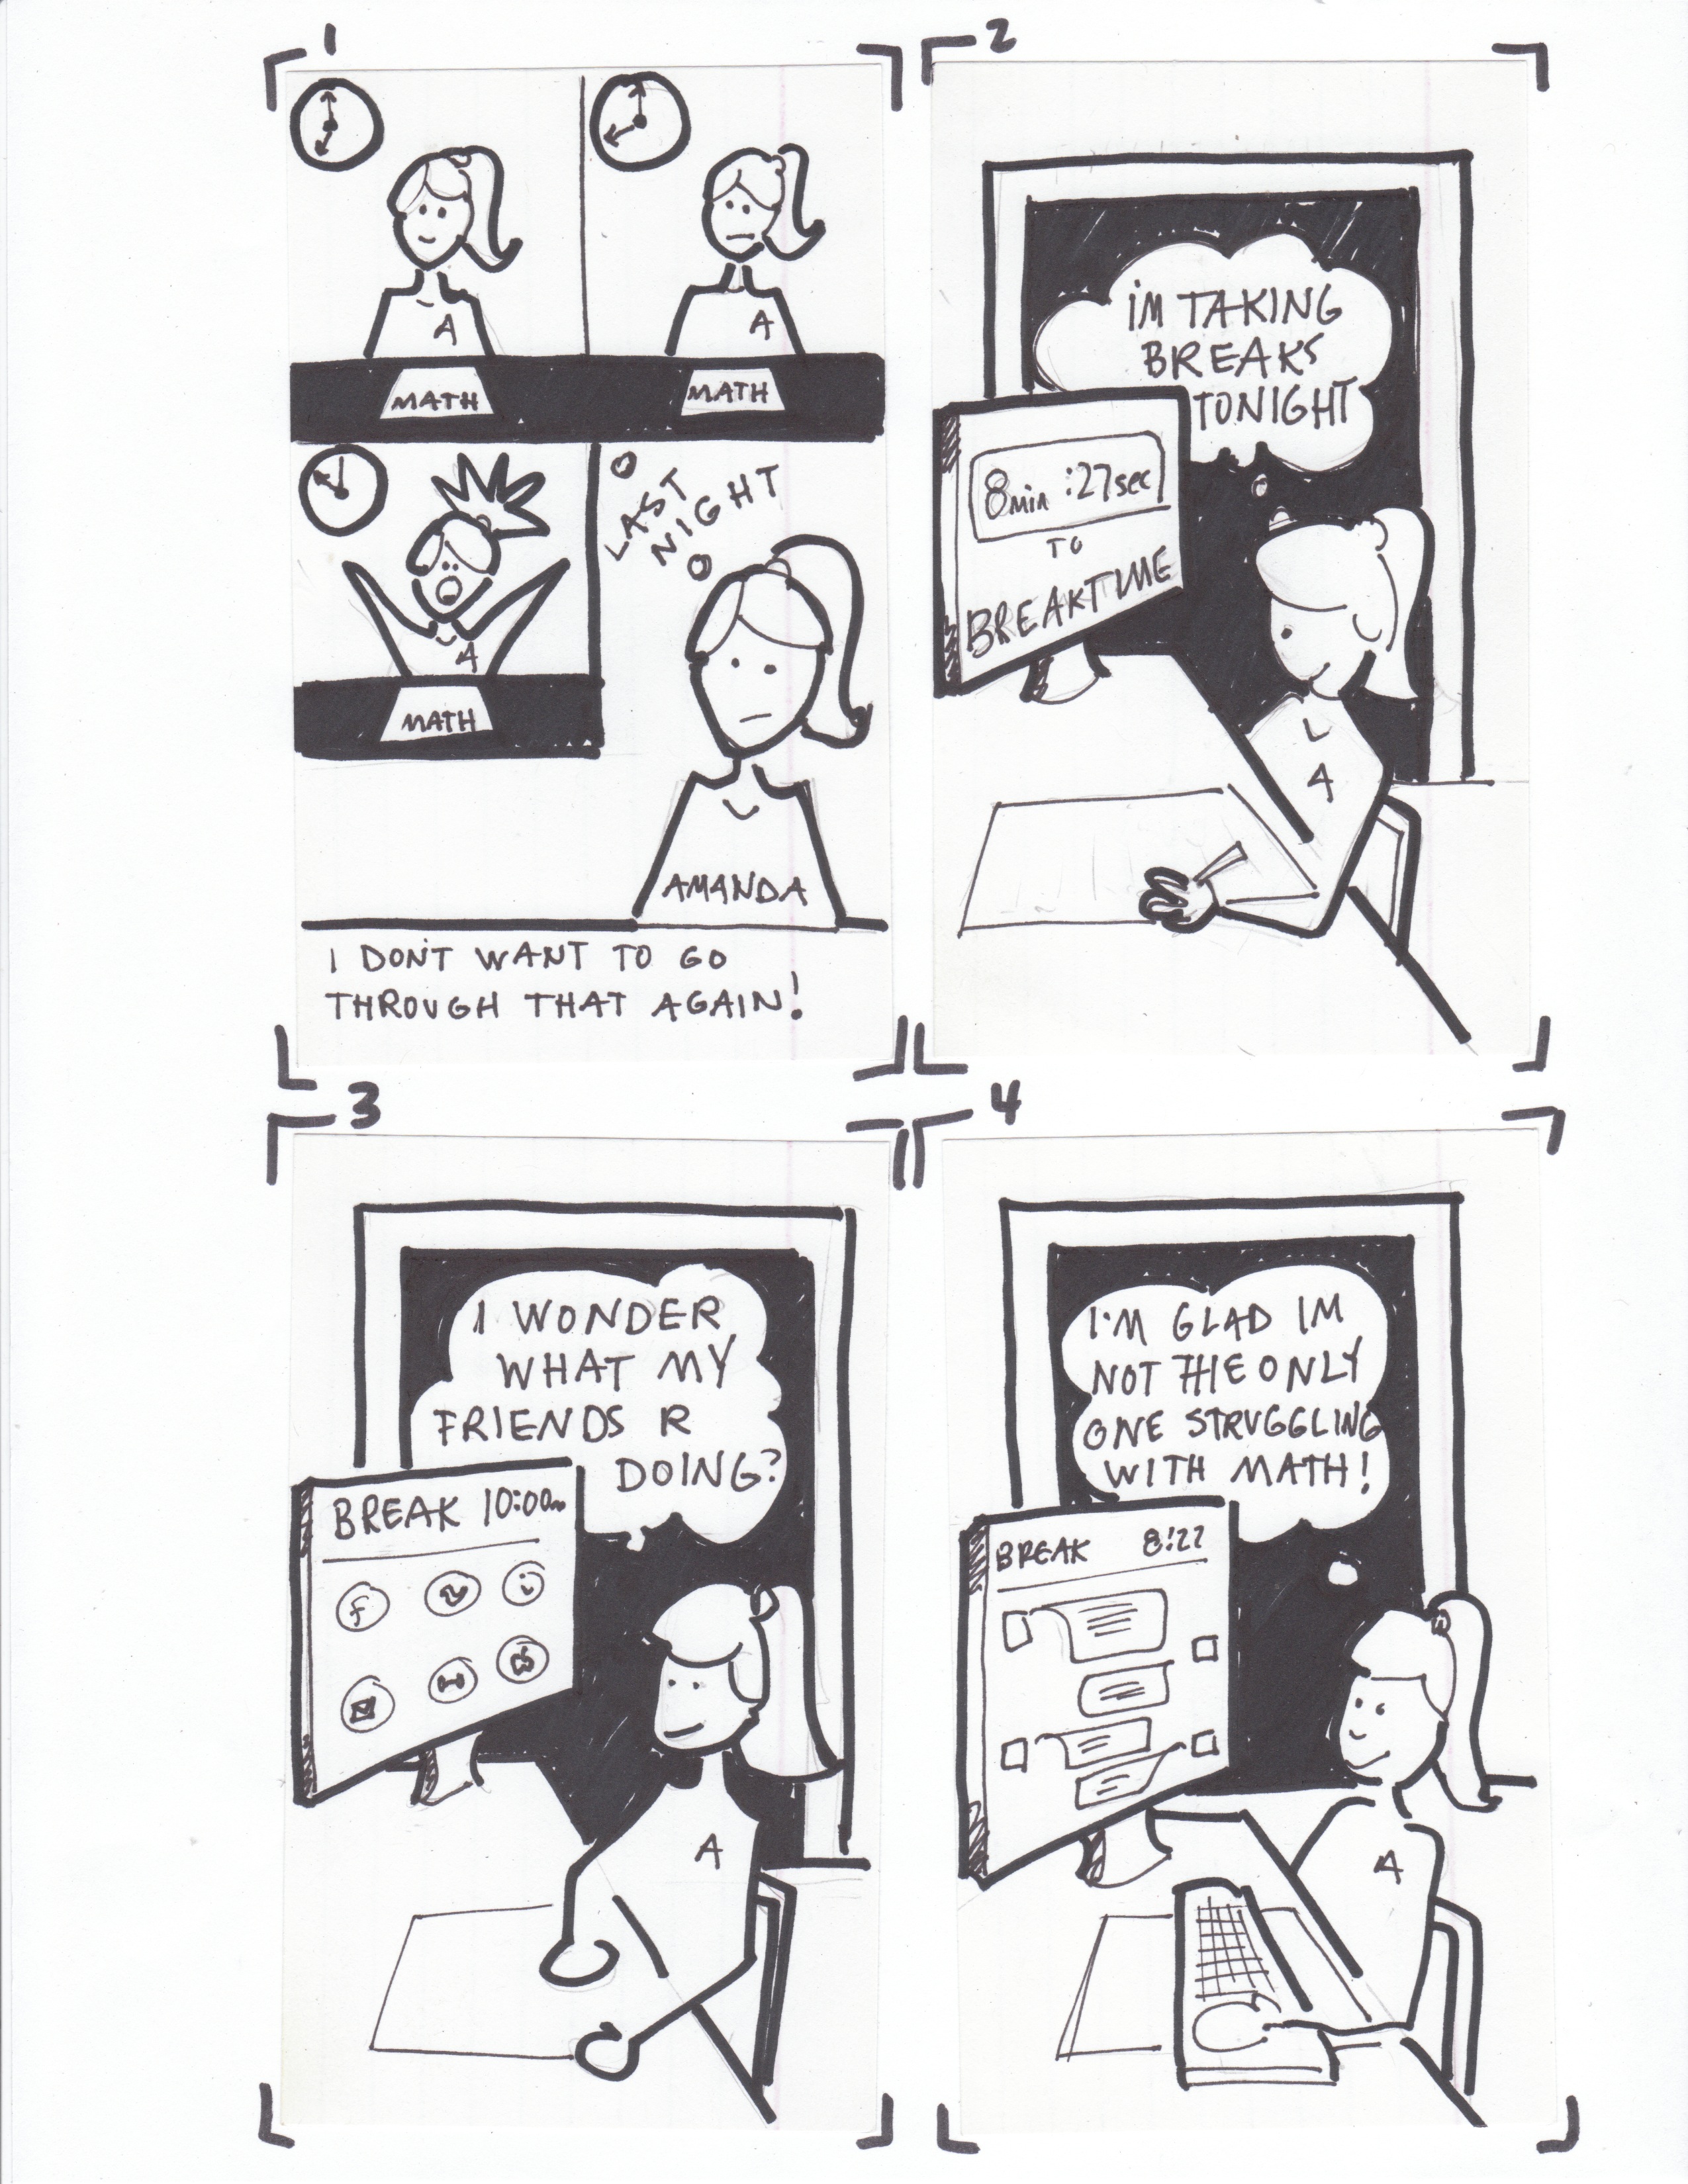
Remember that the three storyboards should diverge, meaning that they each represent different design ideas that address the same point of view. As an example, the following two storyboards both address the point of view "Through clever scheduling, homework doesn't have to be a time-consuming and dreaded process:" Storyboard 1, depicts a way to prioritize tasks; Storyboard 2, depicts a way to factor in breaks.
For this step, lay out your storyboards. Take some time to think about the different ideas you've had. Make sure you think out the strengths and weaknesses of each design, and how well they achieve the goals set out by your point of view. Buy-in and ownership are critical here.
Working as a team, make two paper prototypes. Each should clearly connect to your point of view, but in a completely different way. (Can you see by now that we really value generating and considering diverse alternatives?) Each prototype will instantiate one of your storyboards (pick your two best storyboards). A paper prototype concretely shows all the essential elements of a user interface, except that it's implemented with pen and paper, as opposed to pixels and code. Paper prototypes must be hand-drawn. No computers and printers are allowed. Again, it helps focus on the concepts, and saves you from wasting hours twiddling pixels. It also forces you to focus on the hard conceptual work of figuring out information architecture and functionality now. Years after taking this course, students often come back and tell us that paper prototyping was their favorite part of the course because of its effectiveness for rapid ideation.
Your paper prototypes should be complete enough understand the "gist" of the app and to "run" a new user through each task. Small details that aren't important for designing and do not affect the task (such as the copyright policy page on the Piazza web app) do not need to be included in the prototype. Your prototype interface should enable people to navigate, recover from errors, and change their minds. (It is a good idea to write captions explaining the high-level flow of each 'screen' of your paper prototype so that people understand how it flows. See the student examples below for inspiration.)
Check out the Hanmail video for an awesome example and inspiration.
Here are two student examples from previous years. Keep in mind that the assignment was slightly different.
For this assignment, ONE person will submit the assignment for their team, listing every team member's name and student ID number (PID) in the assignment submission.
Your write-up will contain the following in one single PDF:
Submit your single formatted PDF in Gradescope.
Finally, remember to bring your storyboards to studio to get feedback.
The rubric below contains criteria that are worth one point each and will be graded independently and in a binary fashion.
During studio, click here to self-assess your team's work as a collective unit.
During studio, click here to assess how each of your teammates contributed to this assignment.
Doing A1 was still a useful exercise to get you to practice needfinding, and it will still be graded by your original studio leader. However, you will do A2 and beyond (team project) in your new studio. Don't think of A1 as "wasted" effort, since you got practice doing needfinding, and oftentimes most needfinding ideas (even if you remain in the same studio) do not end up in the final product.